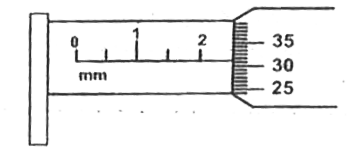
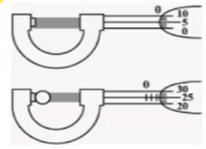
Diagrams show readings of a screw gauge. Figure (i) shows the zero error reading when the screw gauge is closed, figure (ii) the reading when the screw gauge is being used to measure the diameter of a ball-bearing. What is the diameter of the ball-earing ? There are 50 divisions on circular scale.

5.29 mm
5.26 mm
5.32 m
5.28 mm
The correct Answer is:B
Zero error is 3 division
LC = 0.550=0.01mm
zero error = 0.03 mm
Reading = 5.0+29×0.01
d=5.29−0.03=5.26mm.
Topper's Solved these Questions
Similar Questions
Knowledge Check
What is the reading of micrometer screw gauge shown in figure
_E01_246_Q01.png) A2.30 mmB2.29 mmC2.36 mmD2.41 mm
A2.30 mmB2.29 mmC2.36 mmD2.41 mmIn a screw gauge, the zero of mainscale coincides with fifth division of circular scale in figure (i). The circular division of screw gauge are 50. It moves 0.5mm on main scale In one rotation. The diameter of the ball in figure (ii) is
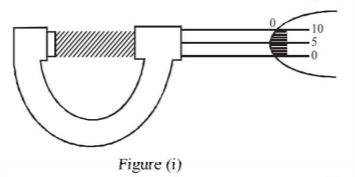
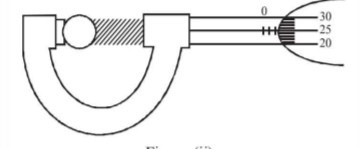 A(a) 2.25mmB(b) 2.20mmC( c ) 1.20mmD(d) 1.25mm
Without changing the number of divisions on the circular scale, if the pitch of the screw gauge is halved, then its accuracy of measurement
AdecreasesBincreasesCremains unaffectedDincreases or decreases depending on the weight.
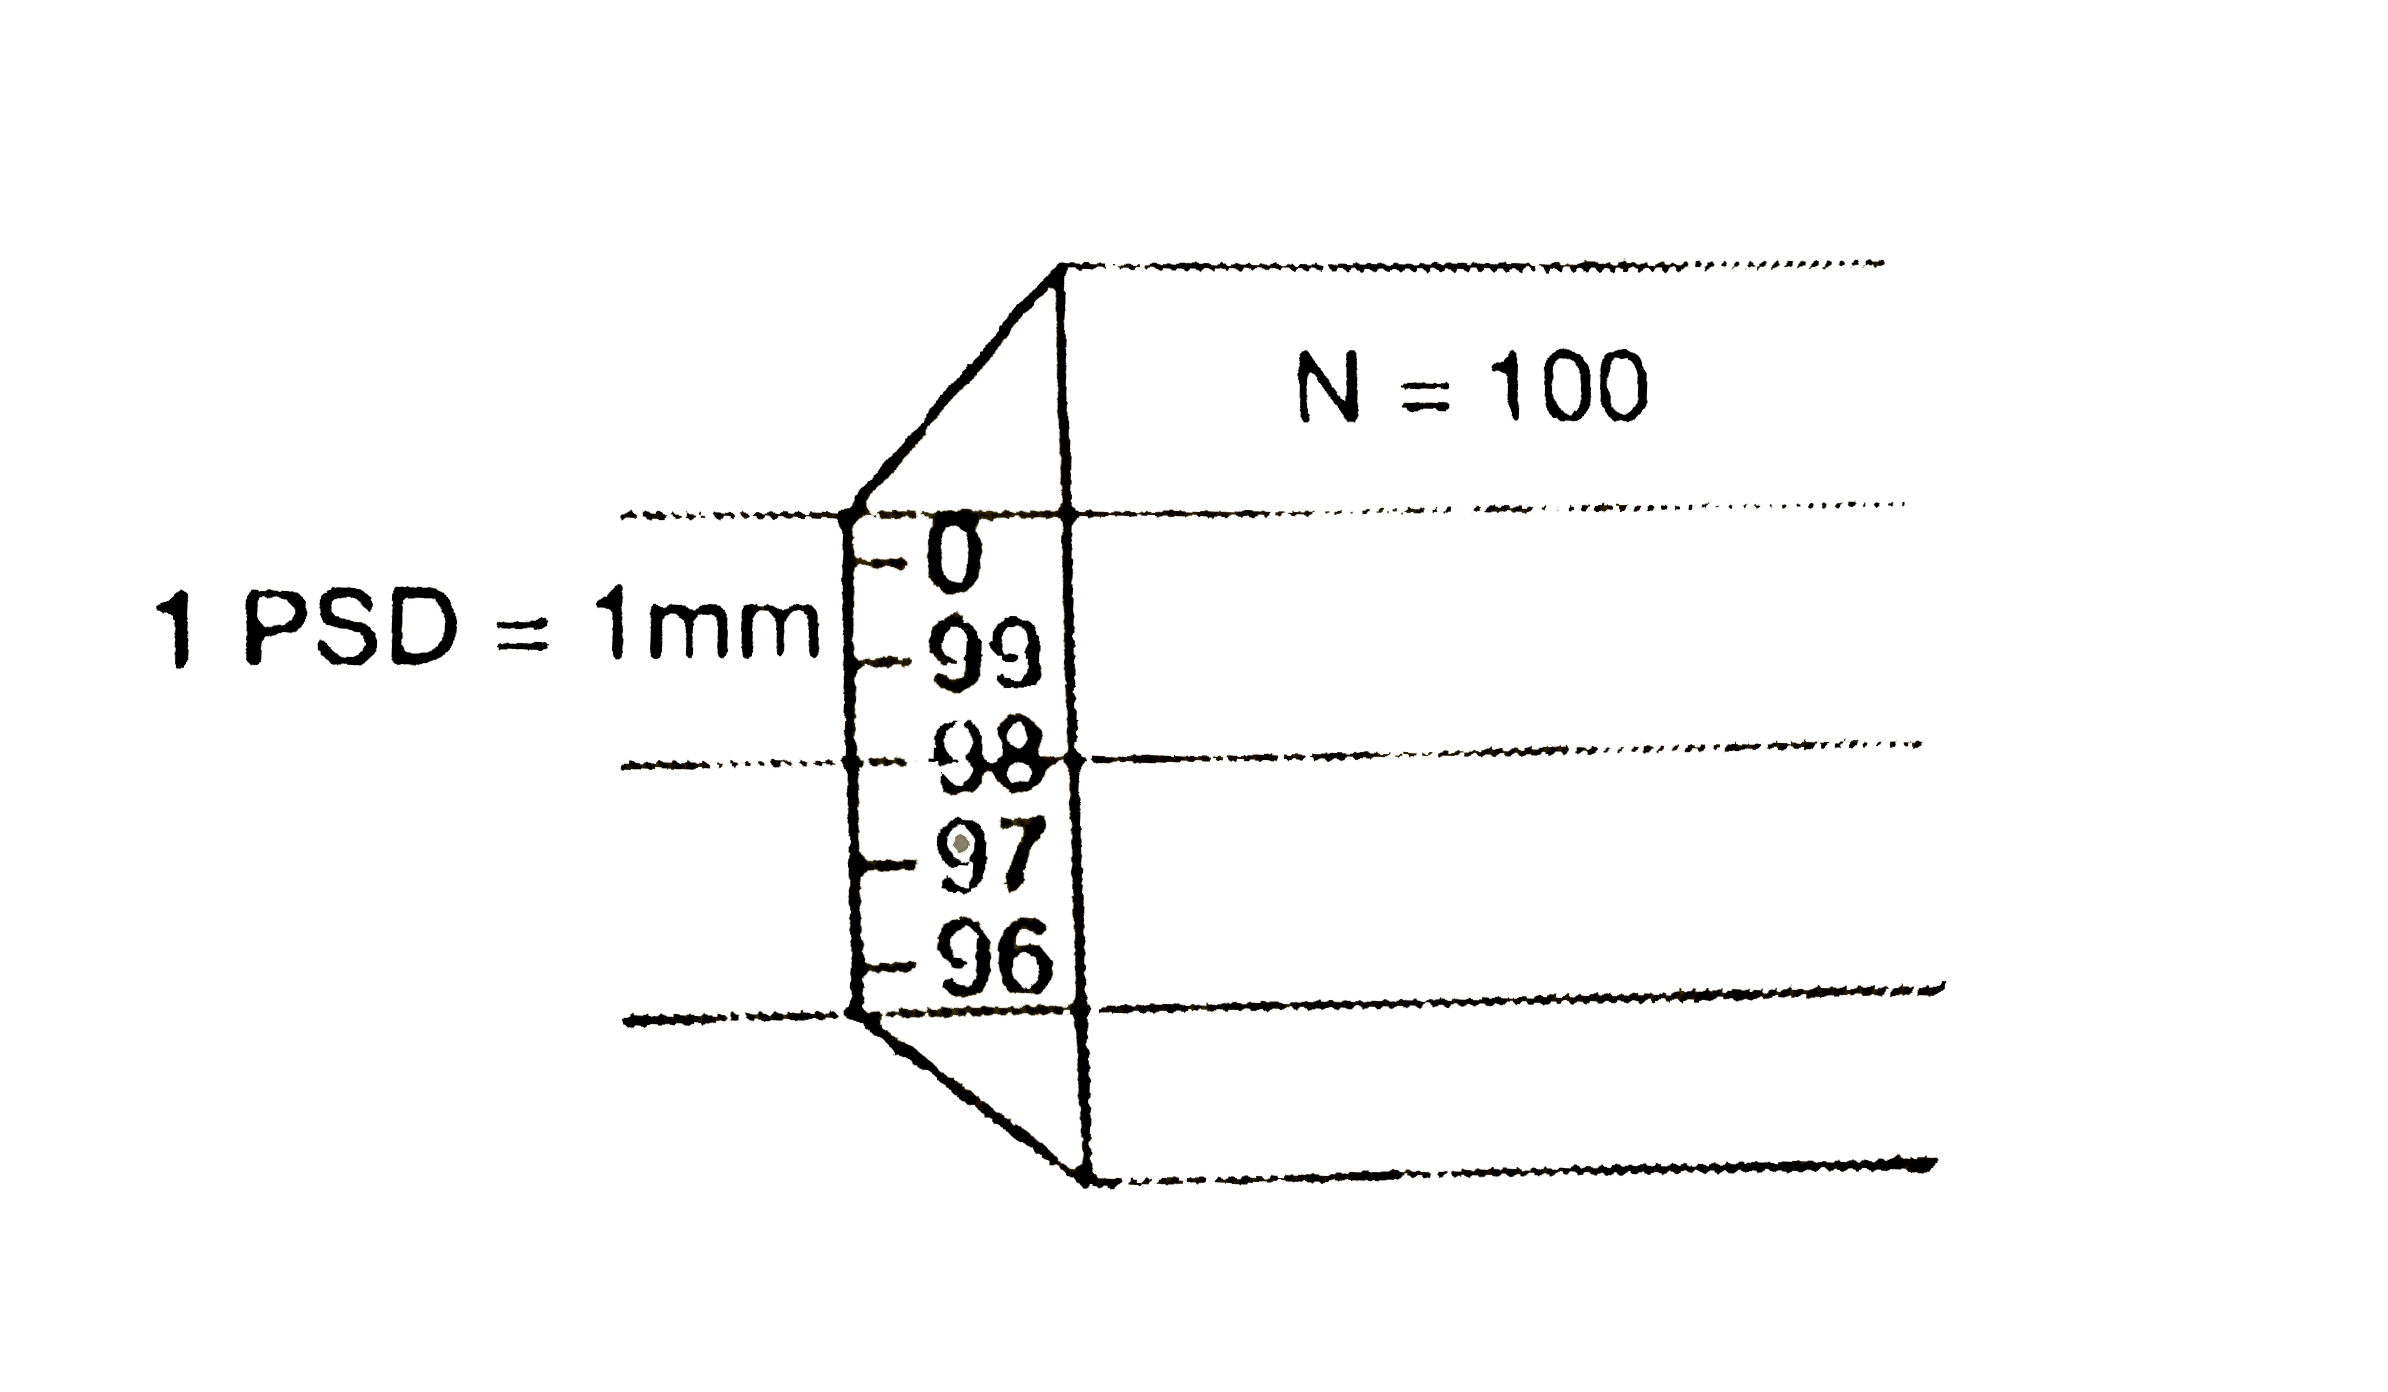
When the studs of a screw gauge are in contact the position of the head of the screw is as shown below Determine the zero error,
View Solutionthe least count of the main scale of a screw gauge is 1 mm. the minimum number of divisions on its circular scale required to measure 5μm diameter of a wire is :
View SolutionA screw gauge advances by 3mm in 6 rotations. There are 50 divisions on circular scale. Find least count of screw gauge
View SolutionThe number of circular divisions on the shown screw gauge is 50 it moves 0.5mm on main scale for moone complete rotation Main scale reading is 2 The diameter of the balls is
 .
.
View SolutionOn six complete rotations, the screw gauge moves by 3 mm on the main scale. If there are 50 divisions on the circular scale the least count of the screw gauge is
View Solution


