Figure shows the details of the parts of a FLANGE PIPE JOINT. Assemble these parts correctly and then draw the following views using scale 1:1.i Front view top half in section. ii Left side view. Print the title and the scale used. Draw the projection symbol. Give 6 important dimensions.
FLANGE PIPE JOINT ASSEMBLYi FRONT VIEW TOP HALF IN SECTION a Drawing both flanges and pipes in top half portion including fillets of R3 and hatching in the broken end of pipe. b Drawing both flanges and pipes in bottom half without hatching including fillets of R3 and hatching in the broken end of pipe. c Drawing a hole of dia 12 on a p.c.d. of dia 106 and hatching of flangesd Drawing bolts and nuts of M10. e Indicating gasket in the top half with shading or cross-hatching and in bottom half. ii LEFT SIDE VIEW a Drawing 5 circles and pitch circle for bolts. b Drawing hatching lines to indicate pipe thickness c Drawing nut and bolt assembly on p.c.d. at one location at least d Drawing cutting planeDETAILS Title 1 Scale used 1 Projection symbol 1 6 important dimensions 3
Related Solutions
For the following figure, draw raw boxes of (i) front view (ii) side view and (iii) top view.
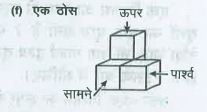
View Solutionनीचे दी हुई वस्तुओं के, सामने से दृश्य, पार्श्व दृश्य और ऊपर से दृश्य खींचे:
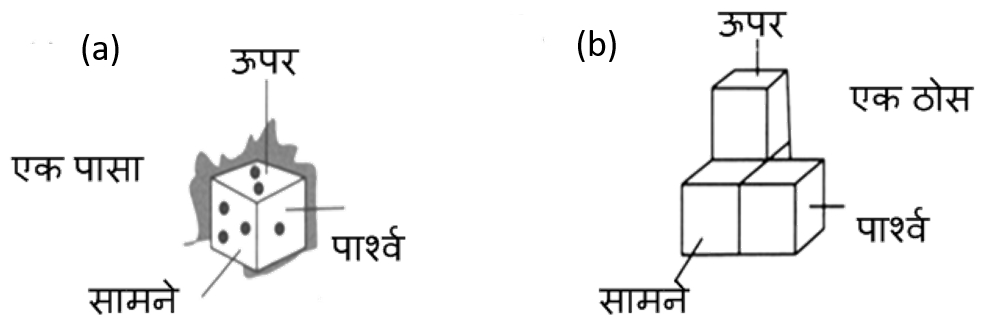
View SolutionDraw the front view, side view and top view of the given objects.
View SolutionDraw the front view, side view and top view of the given objects.
A nut

View SolutionDraw the front view, side view and top view of the given objects
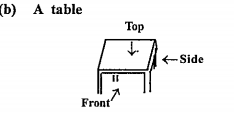
A table
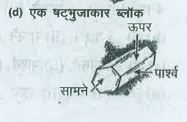
View Solutionदिए गए एक ष्टभुजाकार ब्लॉक के, सामने से दृश्य, पार्श्व दृश्य और ऊपर से दृश्य खींचिए।
View Solutionदी हुई वस्तुओं के, सामने से दृश्य, पार्श्व दृश्य और ऊपर से दृश्य खींचिए -
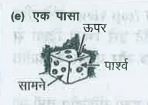
View Solutionदी हुई वस्तुओं के, सामने से दृश्य, पार्श्व दृश्य और ऊपर से दृश्य खींचिए -
View SolutionDraw the front view, side view and top view of the given object :-
View SolutionDraw the front view, side view and top view of the given object :-
View SolutionConsider the distance between two consecutive dots to be 1 cm and draw the front view, side view and top view of the following 3-D figures.
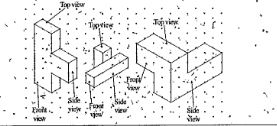
View SolutionDraw the top, front and side views of the given solid.
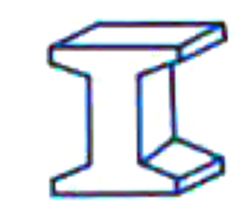
View SolutionLook at the following objects and draw a front view and a top view for them.
View SolutionLook at the following objects and draw a front view and a top view for them.
View SolutionDraw the front view, side view and to view of the given objects.
A solid
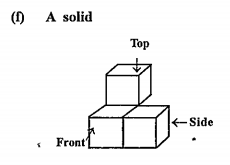
View SolutionDraw the front view, side view and to view of the given objects.
A dice
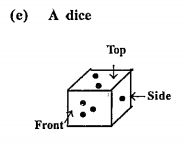
View SolutionDraw the front view, side view and top view of the given objects
A military tent
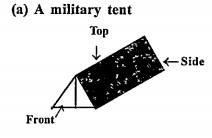
View SolutionDraw the front view, side view and top view of the given objects.
A hexagonal block
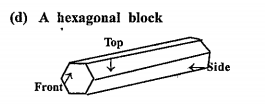
View Solutionएक सम षड्भुज आधार का एक प्रिज्म खींचिए, जिसका एक फलक आपके सामने हो। अब, इस ठोस का ऊपर से दृश्य, सामने से दृश्य और पार्श्व दृश्य खींचिए।
View SolutionDraw a prism with its base as regular hexagon with one of its face facing you. Now draw the top view, front view and side view of this solid.
View Solution